
Winter is coming – so let’s get your home ready the smart way. A thoughtful, step-by-step seasonal home maintenance plan protects your investment, keeps your family comfortable, and cuts down surprise repair costs when temperatures plunge. Use this practical winter home maintenance checklist to spot issues early, prevent damage from snow and ice, and keep energy bills in check. From your furnace and pipes to your roof, windows, and safety systems, this guide shows exactly what to inspect, service, and fix before the first serious freeze.
Cold weather can magnify small problems. Frozen pipes can burst, clogged gutters cause ice dams, tired furnaces fail on the coldest night, and tiny drafts add up to big heating costs. The good news: most winter headaches are preventable with a little planning and a thorough seasonal home maintenance routine. Keep this winter home maintenance checklist handy and work through it section by section – you’ll feel the difference all season long.
1. Heating System Preparation
Your heating system is essential for staying warm during the colder months. Ensuring it’s working properly before the chill sets in is key. Beyond a standard tune-up, think about airflow, controls, and room-by-room comfort so you’re not overheating the whole house just to make one room livable.
Furnace Inspection and Servicing
Before winter arrives, schedule a professional inspection for your furnace. If you’re planning to make any home renovations soon, particularly if you’re considering expanding your living space or converting unused areas, now is the perfect time to ensure your heating system is up to the task. Whether you’re renovating a room or preparing for basement finishing, upgrading your furnace ensures you’ll have a comfortable and efficient heating system for the colder months.
Replace Air Filters
Air filters should be changed regularly, especially during the winter months when your system works harder. Clean filters help improve airflow and prevent the system from overworking. Keep a small stash on hand and set a phone reminder every 30 days (or per the filter rating). If you have pets or run your system continuously, plan more frequent changes.
Programmable Thermostat
A programmable thermostat can help optimize your home’s heating by adjusting temperatures when you’re away. It’s a simple step that reduces energy use and lowers bills during the colder months. If you have a smart model, create schedules for weekday/weekend and enable geofencing so the house warms as you return. For multi-level homes, consider zoning or a room-by-room sensor kit to reduce hot-and-cold complaints.
Reverse Ceiling Fans
Warm air naturally pools near the ceiling, especially in rooms with higher ceilings or open stairwells. By switching your fan to a gentle clockwise rotation, you create a slow updraft that draws cooler air upward and pushes the warm layer down the walls and back into the occupied zone. Set the speed to low so you don’t feel a draft; the goal is quiet circulation, not a breeze. After reversing, many homes can lower the thermostat slightly without sacrificing comfort. If the fan wobbles, tighten blade screws and dust the blades – vibration wastes energy and shortens motor life. Bedrooms benefit from this adjustment too, but keep the speed at the lowest setting so air movement doesn’t feel chilly at night.
Planning an upgrade? High-efficiency furnaces, zoning, or better ductwork can dramatically improve comfort. If you’re evaluating options, make sure you’ve thought through your overall budget for house renovation so mechanical upgrades fit neatly into your bigger plans.
Pipe and Plumbing Protection
Freezing temperatures and wind can transform minor weaknesses in your plumbing into expensive emergencies. Focus on areas where cold air infiltrates or where pipes run close to exterior surfaces – unfinished basements, crawl spaces, garages, exterior walls, and the back of kitchen or bathroom cabinets. Keep interior doors open to allow warm air to circulate, and during severe cold snaps raise the thermostat slightly to protect vulnerable runs. If a room is chronically cold, consider temporary measures like a safe space heater under supervision or adding door and wall air sealing so the space shares more heat with the rest of the home. Preventive attention now is far cheaper than repairing a burst line and the water damage that follows.
Insulate exposed pipes
Choose foam sleeves that match the pipe diameter so they fit snugly, and seal seams with appropriate tape so cold air can’t reach the metal. Insulate both hot and cold lines: hot lines retain temperature better and deliver faster warm water to taps, while cold lines resist freezing and condensation. Where pipes pass through framing, seal the surrounding gaps with caulk or foam to block wind that can turn a safe area into a danger zone. Keep insulation clear of flues, draft hoods, and other hot surfaces per manufacturer clearances, and remember that even flexible materials like PEX can freeze and fail if conditions are severe enough.
Winterize outdoor faucets and hose bibs
- Disconnect and drain garden hoses
- Close interior shutoff valves to exterior lines (if available)
- Open exterior faucets to release any trapped water
- Install insulated faucet covers
Know your main water shutoff
Find the valve where the service line enters the house – often near the front foundation wall, utility room, or mechanical space – and verify you can operate it easily. Many modern homes use a quarter-turn ball valve, while older homes may have a multi-turn gate valve that can seize over time. Practice closing and opening it to ensure it functions and then label it so family members or house sitters can respond quickly. It’s also a good idea to identify individual fixture shutoffs under sinks and behind toilets, which lets you isolate smaller problems without shutting water to the whole home.
Test your sump pump
A seldom-used pump can stick just when you need it. Pour water into the pit until the float rises and the pump activates; you should hear it discharge and see the water level drop quickly. Check that the discharge pipe carries water away from the foundation to a spot that won’t refreeze across walkways. Inside, make sure the check valve is oriented correctly so water doesn’t flow back into the pit when the pump shuts off. If outages are common in your area, consider adding a battery backup pump and a high-water alarm so you’re warned before an overflow occurs.
Roof and Gutter Maintenance
Your roof and gutters take the brunt of winter weather. Keep water moving and ice off the edges to prevent leaks, rot, and roof damage. Plan a dry-day inspection from the ground and attic.
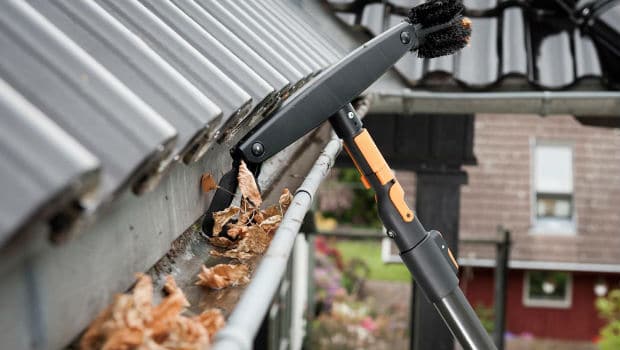
Clean gutters and downspouts
Gutters packed with leaves hold water that freezes into heavy blocks of ice, stressing hangers and feeding ice dams at the roof edge. Clean them thoroughly and flush with a hose to confirm water moves freely to the outlets. If you notice sections where water stands, the gutter likely needs re-sloping toward the downspout; adjust hangers or add new ones to restore a steady downhill run. Downspouts should discharge several metres from the foundation or into a drain designed to handle winter conditions. Dark staining or striping on the fascia and outside of the gutter is a sign of chronic overflow and should be addressed before freezing weather makes it worse.
Inspect shingles, flashing, and penetrations
From the ground, scan for shingles that are lifted, curled, cracked, or missing, then look closely around chimneys, skylights, walls, and plumbing vents where flashing protects joints. Small defects in these areas invite meltwater under the roofing and into the sheathing as temperatures cycle above and below freezing. Inside the attic, check for damp insulation, stained sheathing, or pinpoints of daylight – each is a clue to a leak path. Addressing small gaps and deteriorated sealant now prevents costly interior repairs later and reduces the chance that refreezing water will pry materials apart.
Want to avoid costly errors? Review common home improvement mistakes that homeowners make on roofs (like scraping with metal tools or sealing without addressing ventilation). The right prep keeps your warranty intact and prevents hidden moisture problems.
Trim overhanging branches
Branches that extend across the roof can deposit debris, shade the roof so snow melts unevenly, and break under heavy loads. Prune back growth to create clear space over the roof and remove any dead or damaged limbs that could fall during a storm. Make clean cuts just outside the branch collar to promote proper healing, and avoid topping trees, which weakens structure and invites decay. If limbs are large, high, or near utility lines, hire an arborist to manage the work safely.
Consider ice-dam prevention
If ice dams have been an issue, plan a two-pronged fix:
- Air sealing + insulation (to keep attic surfaces cold)
- Continuous ventilation (to exhaust moist air and equalize roof temperature)
Heated cables can offer short-term relief, but building-science fixes are the long-term solution.
Window and Door Sealing
Heat loss through gaps and drafts is sneaky and expensive. A few small sealing projects can lower bills and make every room cozier. Address the biggest offenders first: original single-pane windows, loose thresholds, and old weatherstripping.
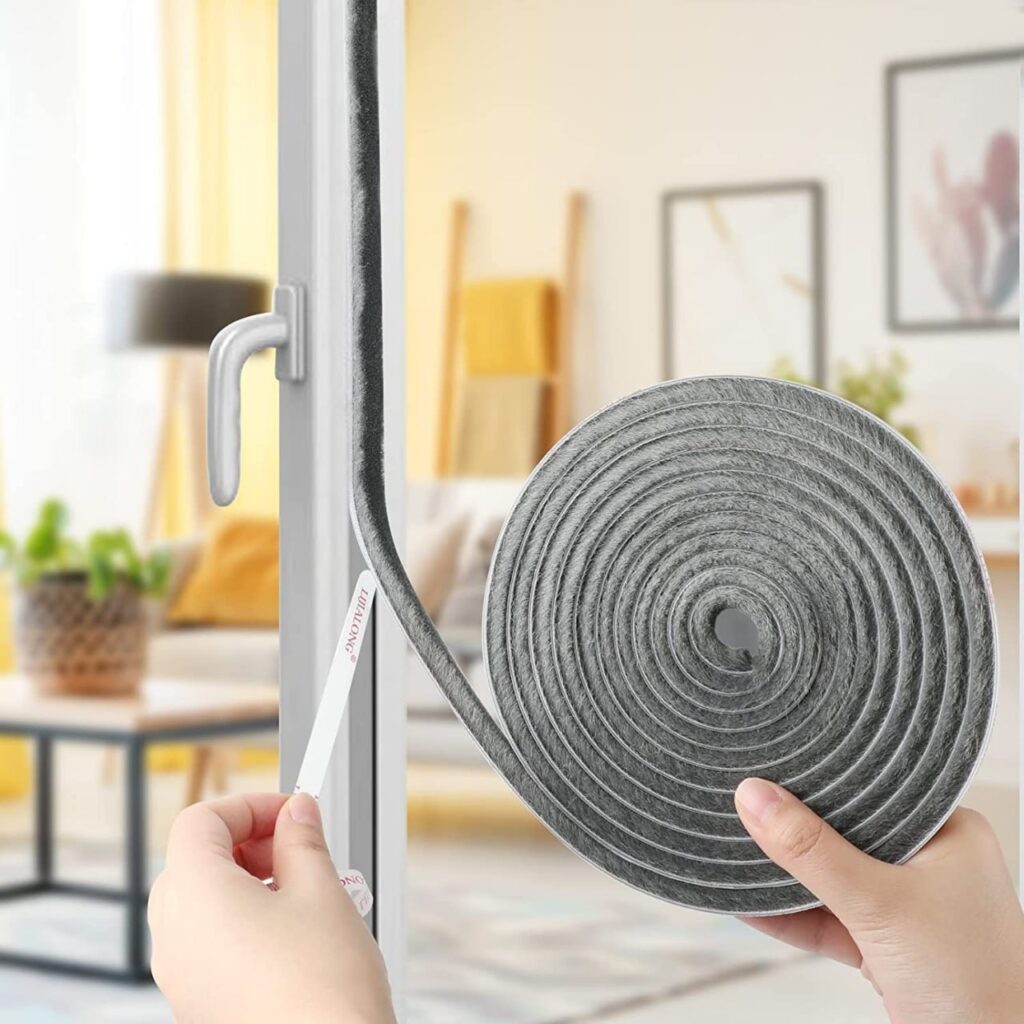
Inspect and replace weatherstripping
Gaps around doors and windows can equal the opening of a small window left ajar all winter. Check for daylight around frames, feel for moving air on windy days, and perform a simple paper test by closing a strip of paper in the door; if it slides out easily, the seal is weak. Modern compression gaskets on doors and quality V-strip or bulb seals on windows provide a durable, tight fit. Adjust thresholds so the door just contacts the sweep without dragging, and correct sagging doors by tightening hinge screws or using longer screws that bite into the framing.
Re-caulk gaps and cracks
Old caulk that has cracked or pulled away no longer blocks air or moisture. Remove failed beads completely, clean the surfaces, and apply a fresh, paintable exterior-rated sealant sized appropriately for the joint. Deep joints benefit from backer rod to create the ideal width-to-depth ratio, which helps the caulk flex with seasonal movement instead of tearing. Work on a dry day with temperatures above the product’s minimum so adhesion is strong, and allow full cure time before painting or exposing to heavy weather.
Add temporary window insulation where needed
For older, drafty windows, interior film kits offer a quick improvement by creating a clear air barrier that cuts infiltration and reduces radiant heat loss from cold glass. Careful installation—clean frames, firm tape, and light heat to shrink the film – results in a smooth, barely noticeable finish. In especially cold rooms, pairing the film with thermal curtains at night provides an extra layer, while opening the curtains on sunny days captures passive heat. If condensation becomes an issue, improve room ventilation and keep indoor humidity in a reasonable winter range.
Looking for practical how-to guidance you can trust? Explore these renovation tips to plan small sealing jobs that deliver big comfort gains.
Fireplace and Chimney Care
A fireplace can be a safe, efficient source of supplemental heat when maintained well. Keep combustible materials clear of the hearth, verify the damper opens freely before each use, and ensure screens or doors are intact to contain embers. Ashes should cool completely before disposal; store them in a metal container with a tight lid set on a non-combustible surface outdoors. Treat the fireplace and chimney with the same diligence you would any heating appliance, since poor maintenance can lead to smoke spillage, carbon monoxide concerns, or chimney fires.
Book a chimney inspection and cleaning
An annual inspection is recommended for all wood-burning systems and for many gas units as well. A professional will evaluate the flue liner, check for obstructions, measure draft, and remove creosote deposits that accumulate with normal use. Heavy users or those who burn unseasoned wood may require cleaning more than once a season. For gas fireplaces, technicians verify venting, safety sensors, and burner performance, ensuring reliable operation when you need it most.
Improve fireplace efficiency
- Add a tight-fitting glass door to reduce heat loss when the fire is out
- Use a grate heater or heat exchanger to reclaim more warmth
- Close the damper tightly when not in use (once embers are fully out)
Store firewood smartly
Proper storage keeps wood dry and ready to burn cleanly. Stack logs off the ground on runners or a rack to encourage airflow and cover only the top so the sides can breathe. Place stacks away from exterior walls to deter insects and reduce moisture against the house. Hardwoods typically need many months to season; burning wood that is still green produces more smoke, increases creosote buildup, and delivers less heat.
Not sure who to trust for masonry repairs or a fireplace insert? Here’s how to find reliable remodelling contractors for specialized projects before peak winter demand.
Safety Systems Check
Colder months mean closed windows, more time indoors, and greater reliance on fuel-burning appliances. This combination increases the importance of reliable detection and response systems. Review the placement of alarms, make sure escape routes are clear and operable, and confirm that dryer vents, range hoods, and bath fans are clean and venting to the outdoors so by-products and moisture don’t accumulate inside.
Test smoke and carbon monoxide (CO) detectors
Use the test button to confirm alarms sound as expected and replace batteries on a set schedule so you’re never guessing. Check the manufacture date on each unit; most alarms should be replaced every seven to ten years because sensors degrade over time. Install smoke alarms in each bedroom, outside sleeping areas, and on every level, and place CO alarms on each level and near sleeping areas, especially if you have an attached garage or any combustion appliances.
Confirm fire extinguisher readiness
Select extinguishers rated for common household fires and mount them where they are easy to reach, ideally near exits so you have a clear escape path. Inspect the pressure gauge to ensure it is in the operable range and verify that the pin and tamper seal are intact. If an extinguisher is used even briefly or shows signs of damage, replace or service it promptly. Take a moment to review how to operate it so everyone in the home can act confidently if needed.
Build or refresh your winter emergency kit
If storms knock out power or roads, you’ll be glad you prepared. At minimum, keep:
- Flashlights and spare batteries
- First-aid kit and necessary medications
- Bottled water and shelf-stable food
- Warm blankets and extra clothing layers
- Power bank(s) for phones and a manual can opener
Insulation and Ventilation
Comfortable, efficient winter performance depends on controlling air movement, adding adequate insulation, and managing indoor moisture. Air leaks drive heat loss through the stack effect, drawing warm air out at the top of the house and pulling cold air in at the bottom. Sealing those pathways first, then increasing insulation, keeps temperatures stable. Ventilation matters just as much; it allows moist indoor air to escape so the attic stays dry and the roof deck remains close to outdoor temperature, which reduces the risk of ice dams.
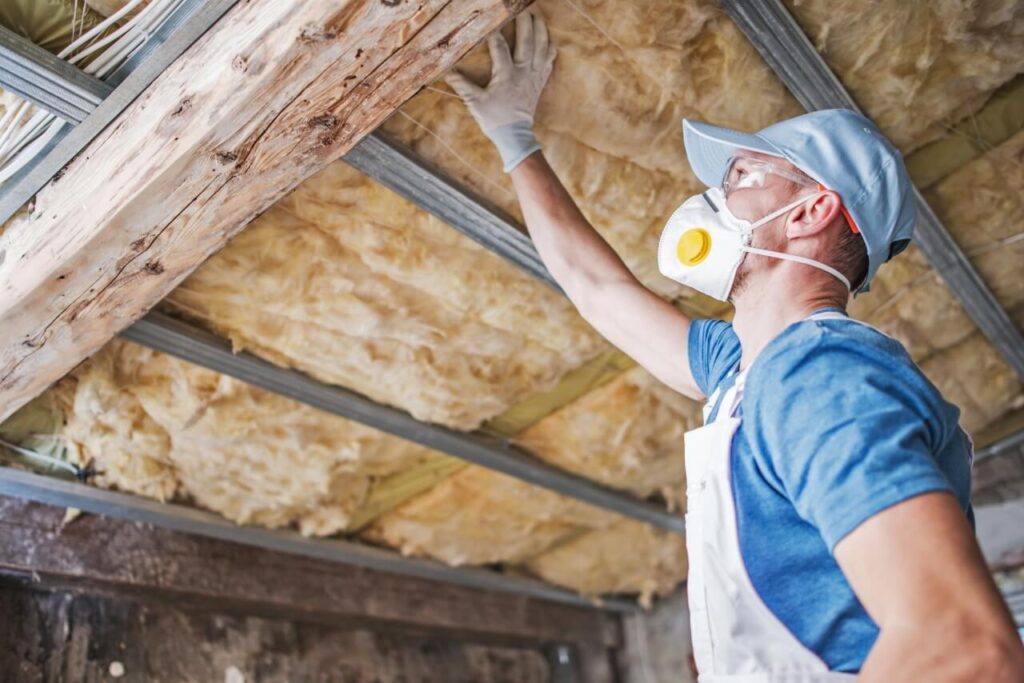
Boost attic insulation and air sealing
Begin by sealing obvious penetrations such as the attic hatch, plumbing stacks, recessed lights, and wiring chases. Once those are tight, add insulation to meet or exceed regional recommendations. A well-sealed and insulated attic reduces heat loss, lowers run time on the furnace, and creates more even temperatures in rooms directly below. If you’ve recently renovated lighting, ensure any recessed fixtures in insulated ceilings are rated for contact with insulation and are properly covered.
Keep ventilation pathways clear
Healthy attics rely on a balance of intake at the eaves and exhaust at the ridge or roof vents. When installing or topping up insulation, maintain open air channels from soffits using baffles so fresh air reaches the underside of the roof. Signs that ventilation needs work include frost on nail tips, musty smells, or persistent dampness on the sheathing in cold weather. Correcting airflow now prevents rot and prolongs roofing life.
Insulate vulnerable plumbing runs
Where pipes cross cold zones, combine insulation with careful air sealing of surrounding gaps. In rooms built over garages, sealing the rim joist and insulating the floor cavities reduces drafts that put plumbing at risk and makes the space above noticeably warmer. In areas with a history of freezing, thermostatically controlled heat cable can be added as a last line of defense, installed according to the manufacturer’s safety guidelines.
Outdoor Preparations
Winter weather is hard on exterior materials, finishes, and equipment. A deliberate sweep around the property helps you find small weaknesses before storms exploit them. Look for places where water collects near the foundation, note loose trim, verify that downspouts are secure, and plan safe access paths to doors so you can manage snow and ice without trampling landscaping.
Store or protect outdoor furniture and equipment
Clean and dry cushions and frames before covering or moving them to storage so moisture doesn’t get trapped. Disconnect propane cylinders from grills and store them upright outdoors. For seasonal equipment like mowers and trimmers, change oil as recommended and add fuel stabilizer so gasoline doesn’t degrade over winter; run the engine briefly to circulate stabilized fuel through the system. Hanging garden tools and hoses keeps them off damp floors and extends their life.
Prepare snow and ice tools
Give yourself an easy first storm by staging everything you’ll need ahead of time. Test-run the snow blower and check that belts and safety features operate correctly. Inspect shovels for cracks and keep them near the entry you use most. Choose an ice-melt product appropriate for your surfaces and pets and store it in a sealed container so it stays free-flowing. Mark driveway and walkway edges with visible stakes before the ground freezes to protect curbs and plantings.
Seal driveways and walkways (weather permitting)
Cracks allow water to penetrate and expand when it freezes, turning hairlines into potholes over winter. When the forecast permits, clean and fill cracks, then apply the correct sealer for the surface. Good preparation and adequate curing time are critical; rushing the job late in the season can trap moisture and lead to premature failure.
Check exterior lighting and railings
Short days and early sunsets demand reliable lighting at entrances, steps, and paths. Replace burned-out bulbs, confirm timers or photocells are working, and aim fixtures to illuminate walking surfaces without creating glare. Tighten wobbly railings and consider adding traction strips to smooth treads where ice commonly forms. Small improvements here reduce slip hazards and make daily routines safer during the darkest months.
Planning Ahead (Beyond This Checklist)
While you work through this winter home maintenance checklist, you might uncover bigger wish-list items – entryway rebuilds that handle slush, a mudroom, better storage, or safer exterior stairs. If you’re exploring upgrades that stand up to Canadian winters and boost curb appeal in the spring market, browse home renovation in Scarborough ideas and start early conversations so you can schedule work for the right weather window.
How to Use This Checklist Efficiently
Every house is different. The best seasonal home maintenance routine is the one you’ll actually complete. Break tasks into four weekly blocks so nothing gets skipped:
- Week 1: Heating system tune-up, filter changes, thermostat programming, ceiling fans
- Week 2: Pipe insulation, exterior faucet winterization, sump pump test
- Week 3: Gutters and roof inspection, window/door sealing, exterior lighting
- Week 4: Fireplace and chimney care, safety system checks, outdoor storage, snow tool prep
Snap photos of problem areas, note filter sizes and bulb types, and keep receipts. Next year’s seasonal home maintenance will be mostly review and light touch-ups.
Conclusion
A comprehensive winter home maintenance checklist is one of the smartest investments you can make before temperatures drop. By systematically inspecting your heating system, protecting plumbing, clearing gutters, sealing drafts, servicing fireplaces, verifying safety gear, and tuning insulation and ventilation, you’ll enjoy a warmer, safer, more efficient home all season. Make this guide your baseline for seasonal home maintenance, keep notes as you go, and tailor it to your home’s age, layout, and climate. With a little preparation now, you can spend the rest of winter enjoying your space – not worrying about it.